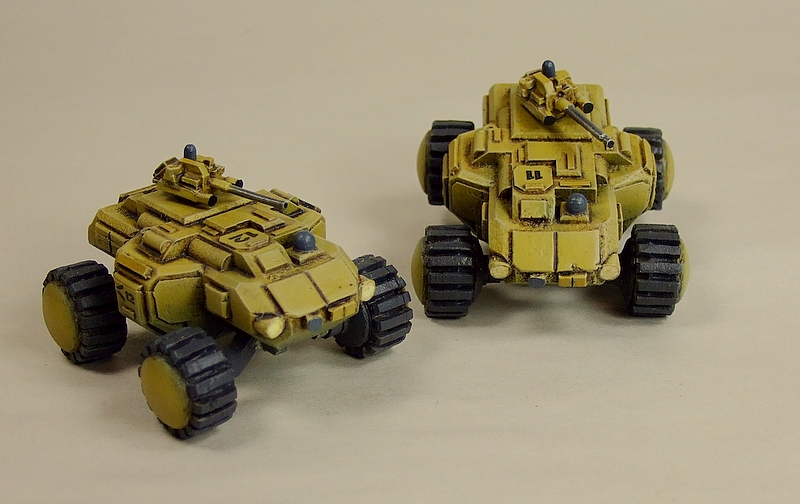
The transport, drones and support attachments are finaly done for my mechanised infantry platoon of Ground Zero Games 15mm New Israelis.

Despite an interruption of many months this project was a lot of fun to pick up and complete. The scheme was a simple one, so it was easy to carry on from where I had left off.

I want to apologise right now for the lack of step-by-step photos. These final shots will have to do.
Picking up from the last post on this project, I used an airbrush to lay down a coat of Vallejo Matte Varnish before Dry-brushing with buff coloured artists' oil paint. The advantages in terms of time and workability that come from working in oils made this step less stressful. If I went too heavy, I could easily subtract using a clean brush moistened with thinner.

A spot of Future (Klear) was dabbed-on and allowed to dry wherever I intended to put down decals. A mix of decals from old kits and a home-made set of unit numbers went on using micro-sol decal products.

Once the decals were set & dry I was eager to try out a suitably tinted Filter from Mig Productions. I wanted to tone-down the camo & dry-brushing and tie-in the decals as well as other details and a filter (basically a very thin wash) is a good way to do this.
It's easy enough to mix a suitable wash with either acrylic or oil-based paints, but I wanted to try the MIG product. I found it was convenient to use and that it did the job well. The fact that I can come back to the jar again and again for consistent results is a big plus. The MIG Filters are intended to allow easy application of multiple thin coats, building up transparently, providing subtle results.
 Final work included lights, vision blocks and other details. This
stage offered the biggest opportunity to add personality to each vehicle and to make the mistakes I would really regret.
Final work included lights, vision blocks and other details. This
stage offered the biggest opportunity to add personality to each vehicle and to make the mistakes I would really regret.Fortunately the coat of Vallejo Matte Varnish I had previously put down proved to be very durable & so I was able to 'undo' a couple of bad ideas without damaging the good work underneath. So I'm happy with the Vallejo Matte Varnish for a couple of reasons: it's fairly tough, and it is UV resistant. I'll be using this on every project I think.
Last of all everything got a coat of krylon Matte spray for protection. This is not dead-flat matte, tending instead to satin, but I like it for the durability. If I need dead matte I can hit these again w/ a dusting of the Vallejo.

The flight base for the GZG Roach is made with a Warbases 70mm Hex, fender washers, 5/32" brass tube, 1/4" acrylic rod and Golden Acrylic High Solids Matte Gel. Texturing and decoration are a selection of aquarium plants, Woodland Scenics rock-moulds, grass-tufts and found materials.
Your comments and criticism, as always, are welcome.
Peabody out.


That is without doubt a beautiful army. Well done. You should be proud.
ReplyDeleteCheers
Mark
Thanks Mark. :)
ReplyDeleteThe Dropship sparked my interest in 15mm Sci-Fi, so the credit is all yours.
Thomas
Very nice work. And a nice, informative write up too.
ReplyDeleteImpressive work indeed! Love the colour scheme.
ReplyDeleteI've recently started dabbling in 15mm as well and it's a lot of fun.
Seeing your painted dropship has made me realize that I need one (or two) as well. Now, if only GZG would open up their new store. :)
Thanks Martin. Your 15mm work is inspiring. I look forward to seeing what you make of the new GZG Crusty Mecha.
ReplyDeleteFantastic paint job, and fascinating writeup. Thanks for posting.
ReplyDeleteThanks Peabody!
ReplyDeleteYeah, I'm not sure what to make of the crusty mech. It's certainly different from what I imagined and looks more like a 28mm model than a 15mm one. But then again, the pictures available atm aren't all that clear.
Beautiful models.
ReplyDeletewelcome back...enjoy your blog especially your tutorials
ReplyDeleteStunning work, a really complete looking force!
ReplyDelete